


When transforming the text after rasterizing it I used the Warp option to curve the text a little. I opened Blending Options and used the Stroke and Drop Shadow options after I selected the inside of the text with the Magic Wand and used a gradient inside. Doing this makes text pop out much more and make it more visually interesting.

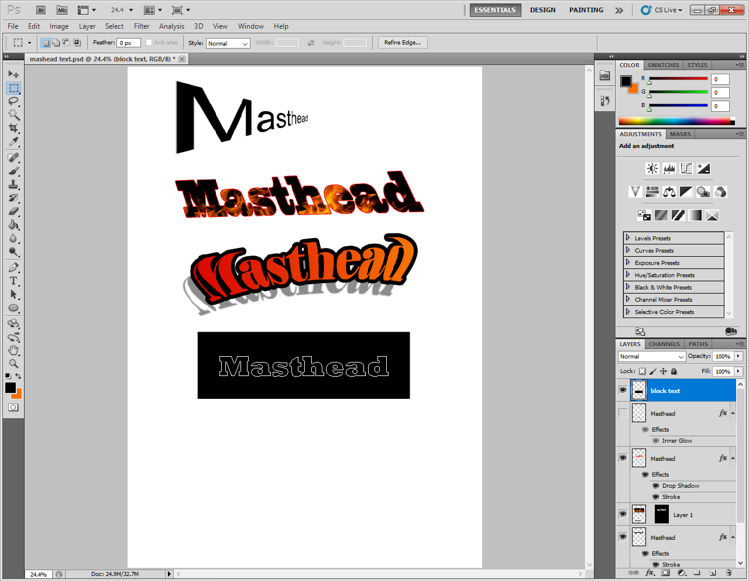

I made some text,saved a selection of it and then created a rectangle.Then I loaded the selection,placed it over the shape while it's layer was selected and pressed delete. It's simple but I think it's effective since it stands out so much within.

I used the Text tool on the circle that I made so it curves. I hid the circle layer so the text was on it's own after this. It's a good method for fitting text around objects or just makes it stand out a little from regular text.

I made a random shape to fit the text to since I knew it could fit the circle from before. I made the shape with the Pen tool and then used the Text tool on it. The text looks inconsistent with it's spacing so this method works better with a more normal shape.


I made a duplicate layer of the text,flipped it and lowered the opacity. There's probably a quicker way to make a reflection but this still works fine.

I made use of Warp Text which has different styles to fit a text
box to.
this gives extended insight into the process- good use of print screens and you are touching onthe skills you have learned, which processes and combination you feel where successful, what obstacles you found etc- well done.
ReplyDelete